在上一节讲到了Softmax回归的数学原理,这一节我们来将其使用Python实现出来!
在本文的程序中,除了下载并读取MNIST之外,不会使用任何深度学习框架,纯Python+Numpy实现,小白专用!
首先下载并读取MNIST数据集,这里我们使用Tensorflow进行下载和读取。先引入依赖包:
from __future__ import absolute_import
from __future__ import division
from __future__ import print_function
import gzip
import os
import tempfile
import numpy as np
from six.moves import urllib
from six.moves import xrange  # pylint: disable=redefined-builtin
import tensorflow as tf
from tensorflow.contrib.learn.python.learn.datasets.mnist import read_data_sets
接着将数据集下载到MNIST文件夹内:
mnist = read_data_sets("MNIST/", one_hot=False)耐心等待下载完毕。接着可以开始了。
在这之前先定义一个显示图像的函数。由于MINST数据集的图像都是28*28的,所以为了方便,函数的功能也是专门显示28*28的图像:
import matplotlib.pyplot as plt
def show_image(image_array):
    _im = image_array.reshape(28,28)
    fig = plt.figure()
    plt.imshow(_im ,cmap = 'gray')
    plt.show()
我们可以调用下面的函数,随机读取100个训练集以及其对应的标签。(每调用一次,随机返回100个训练图像,赋给batch_xs,图像对应的正确标签给了batch_ys):
batch_xs, batch_ys = mnist.train.next_batch(100)OK,我们测试一下吧:
batch_xs, batch_ys = mnist.train.next_batch(100)
for i in range(5):
    show_image(batch_xs[i])    #显示图像
    print(batch_ys[i])         #显示对应的标签
运行结果(点击查看大图):
这里返回的数据是随机的,你的结果可能和我的不一样,只要确保图案中的数字和下面对应的标签一样,就说明你的程序到这里还没有错误。接着我们使用前文中的Softmax梯度下降公式定义一个梯度下降函数
def gradientAscent(feature_data, label_data, weights, maxCycle, alpha):
    '''梯度下降法训练模型'''
    '''feature_data:训练集'''
    '''label_data:标签'''
    '''weights:权重(因为这个函数要执行多次,所以可能用到上次运行完求出的权重)'''
    '''maxCycle:迭代次数'''
    '''alpha:学习率'''
    m, n = np.shape(feature_data)  #m为训练集矩阵的行数,即训练样本的个数,n为训练集矩阵的列数,即每个样本的特征个数
    #weights = np.mat(np.random.random((n, 10)))  #权值。n行k列的矩阵。第n行表示"第n个特征能代表是第k个类别的权重"
    for i in range(maxCycle):          #梯度下降,迭代maxCycle次
        err = np.exp(feature_data * weights)
        rowsum = -err.sum(axis=1)
        rowsum = rowsum.repeat(10, axis = 1)
        err = err / rowsum
        for x in range(m):
            err[x, label_data[0, x]] += 1
        weights = weights + (alpha / m) * feature_data.T * err
    return weights
上面这个函数就是整个程序最关键的内容了,下面我们只需要迭代调用就行了。为了让程序看起来好看些,定义一个训练函数:
def train_start(times = 10, w = np.mat(np.zeros((784, 10))), save = True):
    mnist = read_data_sets("MNIST/", one_hot=False)
    for i in range(times):
        print("Training ", i+1, " Data, ", 100.0*i/times, "% in Process...")
        batch_xs, batch_ys = mnist.train.next_batch(100)
        w = gradientAscent(np.mat(batch_xs), np.mat(batch_ys), w, 10000, 0.01)
    print("100% Finish!")
    if save == True:
        np.savetxt('./mnist_weights.txt', w)
        print('Success Save Weights_array')
    return w
times参数为训练次数,w为权重,为了方便传入已经算出来的权重。如果是第一次运行,让w初始化为784*10的矩阵即可。save为是否保存的参数,为True的时候,会将计算出的权重值保存到./mnist_weights.txt。
OK,开始训练吧!
w = train_start(times = 600)P.S.:事实证明,times为100时和600时,效果相差不大,这是由于程序还只是一个入门级的程序,没有复杂的优化算法
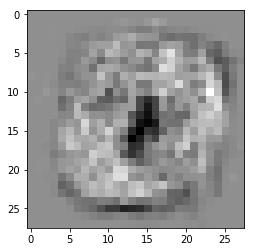
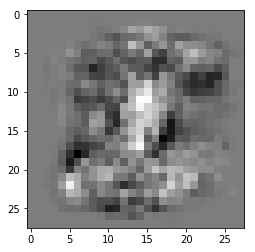
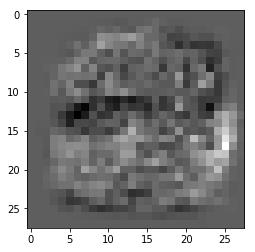
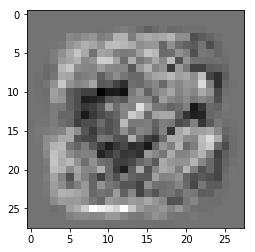
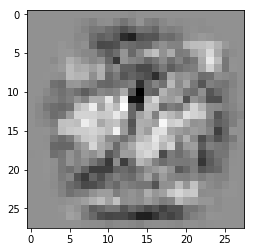
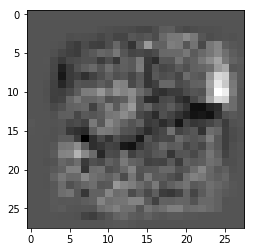
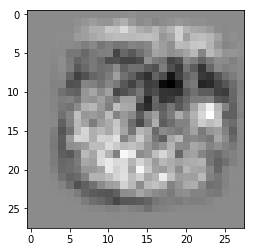
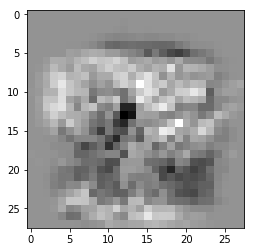
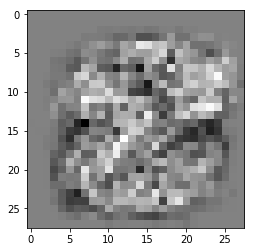
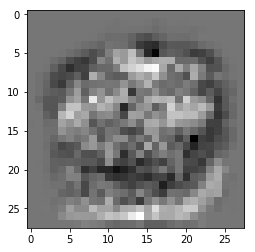
接下来的这一步能让你很直观的看到w矩阵的"样子":
def show_weights_image(w):
    for i in range(0,10):
        _im = w.T[i].reshape(28, 28)
        plt.imshow(_im , cmap='gray')
        plt.show()
show_weights_image(w)
运行 结果:(白色像素点表示"这个像素点很能表示这个图片是这个数字",黑色像素点表示"这个像素点很能表示图片不是这个数字")
接着来测试一发吧。我们先定义一个预测函数:
def predict(test_data, weights):
    h = test_data * weights
    return h.argmax(axis=1)
样本乘以权重得到的数组中,每一项表示了图片上面写的数字为当前项的下标的概率。因此我们只需要使用argmax函数找到下标最大值即可。
为了将所有的MNIST测试集都测试一遍,检验准确度,我们再定义一个函数:
def judge_predict():
    mnist = read_data_sets("MNIST/", one_hot=False)
    right = 0
    for i in range(10000):
        a = predict(mnist.test.images[i], w)[0,0]
        if a == mnist.test.labels[i]:
            right+=1
        #else:
            #show_image(mnist.test.images[i])
            #print(a)
    print('test complete. right rate: ', right/10000 * 100, '%')
直接调用它:
judge_predict():运行结果:

这里我的训练次数,即time值为600。经过了几个小时的训练,我们的模型准确率达到了87.07%
(当time为200时,训练时间大概为几分钟,准确率86%)
总结一下这个程序:
from __future__ import absolute_import
from __future__ import division
from __future__ import print_function
import gzip
import os
import tempfile
import numpy as np
from six.moves import urllib
from six.moves import xrange  # pylint: disable=redefined-builtin
import tensorflow as tf
from tensorflow.contrib.learn.python.learn.datasets.mnist import read_data_sets
import matplotlib.pyplot as plt
np.set_printoptions(suppress=True)
%matplotlib inline
#输出28*28图形
def show_image(image_array):
    _im = image_array.reshape(28,28)
    fig = plt.figure()
    plt.imshow(_im ,cmap = 'gray')
    plt.show()
#梯度下降学习函数
def gradientAscent(feature_data, label_data, weights, maxCycle, alpha):
    '''梯度下降法训练模型'''
    '''feature_data:训练集'''
    '''label_data:标签'''
    '''w:权重'''
    '''maxCycle:迭代次数'''
    '''alpha:学习率'''
    m, n = np.shape(feature_data)  #m为训练集矩阵的行数,即训练样本的个数,n为训练集矩阵的列数,即每个样本的特征个数
    #weights = np.mat(np.random.random((n, 10)))  #权值。n行k列的矩阵。第n行表示"第n个特征能代表是第k个类别的权重"
    for i in range(maxCycle):          #梯度下降,迭代maxCycle次
        err = np.exp(feature_data * weights)   #错误率。
        rowsum = -err.sum(axis=1)
        rowsum = rowsum.repeat(10, axis = 1)
        err = err / rowsum
        for x in range(m):
            err[x, label_data[0, x]] += 1
        weights = weights + (alpha / m) * feature_data.T * err
    return weights
#预测函数
def predict(test_data, weights):
    h = test_data * weights
    return h.argmax(axis=1)
#输出权重图
def show_weights_image(w):
    for i in range(0,10):
        _im = w.T[i].reshape(28, 28)
        plt.imshow(_im , cmap='gray')
        plt.show()
#训练
def train_start(times = 10, w = np.mat(np.zeros((784, 10))), save = True):
    mnist = read_data_sets("MNIST/", one_hot=False)
    for i in range(times):
        print("Training ", i+1, " Data, ", 100.0*i/times, "% Process...")
        batch_xs, batch_ys = mnist.train.next_batch(100)
        w = gradientAscent(np.mat(batch_xs), np.mat(batch_ys), w, 10000, 0.01)
    print("100% Finish!")
    if save == True:
        np.savetxt('./mnist_weights.txt', w)
        print('Success Save Weights_array')
    return w
#评估准确率
def judge_predict():
    mnist = read_data_sets("MNIST/", one_hot=False)
    right = 0
    for i in range(10000):
        a = predict(mnist.test.images[i], w)[0,0]
        if a == mnist.test.labels[i]:
            right+=1
        #else:
            #show_image(mnist.test.images[i])
            #print(a)
    print('test complete. right rate: ', right/10000 * 100, '%')

w = train_start(times = 600) #time为学习次数
judge_predict()


